Google+ peggy aplSEEDS: August 2010

Wednesday, August 25, 2010

WOYWW: One Dollar Books!

Hello, WOYWWers!

I thoroughly enjoyed reading your comments last week, but alas, that was all I had time for.  As those of you who visited me last week know, I am out of the country and being away from the computer almost the whole day, I didn't have time to visit any one.  I will have to make up for that when I get back home.

Actually the first week of my trip was for work.  Where?  Funny, I didn't realize the Japanese newspaper on my "hotel desk" would confuse you about where I was.  Here is the tally of guesses (although I may have missed someone) ...

Jona, voodoo vixen, Serendipity Stamping guessed Rome,
Julia, Chrissie, Darcy, Claireliz, Andrea, Daniele, Phree, Spyder had no idea,
Sue, Beedeebabee, mustavcoffee didn't have a clue (well of course that's the same as "had no idea")
Beedeebabee, Twiglet, Serendipity Stamping guessed Greece,
mustavcoffee had many guesses and finally had had her hubby guessing Germany,
Judy guessed Egypt,
Elizabeth thought it was the big park in San Francisco, although she was sure it was somewhere exotic, (hmmm)
and the winner is..... (oh was it a contest? Who knows, I may get to make a giveaway for the one who guessed right...)

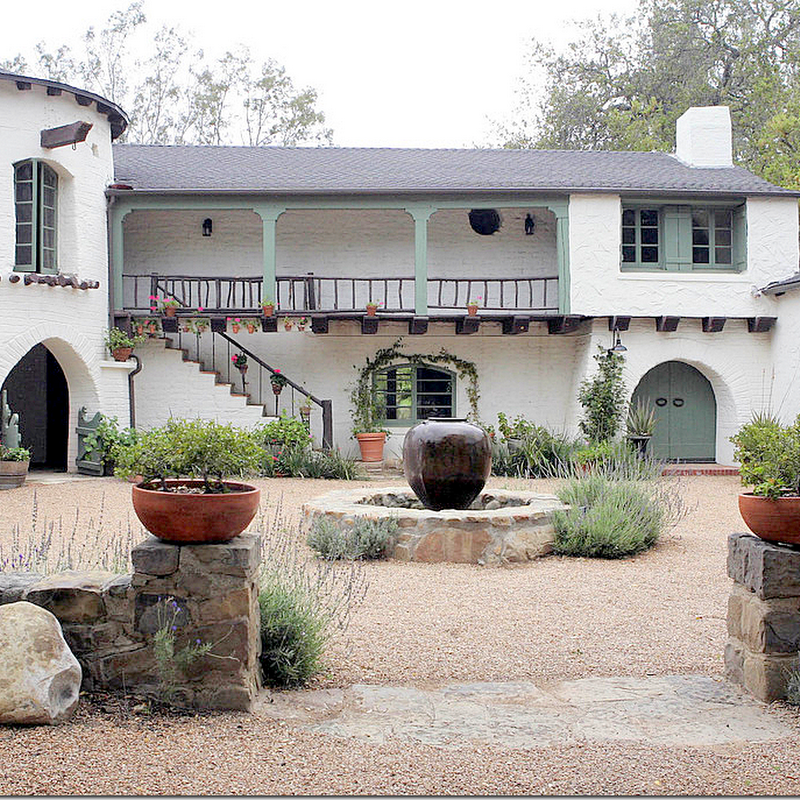
Carola Bartz, who said Palace of Fine Arts in San Francisco.  The palace was originally constructed for the 1915 Panama-Pacific Exposition in order to exhibit works of art presented there. One of only a few surviving structures from the Exposition, it is the only one still situated on its original site. Read more about it in Wikipedia. And the Japanese newspaper? The airline we took stops over in Japan.

So now, for my desk (why are my WOYWW posts always so long!)... it is not actually a desk.  It is a box we are packing filled with finds from the One Dollar Bookstore in Long Beach, California (we are visiting family there).  Anyway, I thought I would share with you some of my art related finds.


Here is a foreign language book I bought.  No, I don't speak this language and I don't even know what language it is in (do you?).  My husband said it was Greek. Well, it is all Greek to me!

Take a look at the lovely inside pages. 


I haven't decided what I will do with this book.  It seems too pretty to take apart to use as backgrounds.  Should I?  Perhaps an altered book?  Any suggestions?

The next book I wanted to show you is a collection of sketches by Queen Victoria. 


Lots of colored and black and white sketches.  Great inspiration!


Perhaps you would like to take a look at real desks and not a box of books or to show us your own desk.  Head on over to Julia's blog for the What's on Your Workdesk Wednesday link party.  Happy WOYWW!

Wednesday, August 18, 2010

Travelling WOYWW


It's not my usual desk today, folks, since I am out of the country.  And so sorry, but I don't know if I will have the time to go visiting the other desks that are linked up to Julia's What's on Your Workdesk Wednesday

Anyway, here is the side table in our hotel room,  See the Japanese newspaper I got from the plane?  I thought it would make good backgrounds for ATCs.  Foreign language papers are always interesting to me.  Those two zippered pouches have the art materials I brought with me this trip.  The red one contains a pencil, charcoal pencil, eraser, sharpener, some pens and some ATC blanks.  The other one contains some colored pencils and some ATC blanks coated in wall putty.

On top of my Eee PC, I put some ATCs with some line drawings I made while waiting in the airport, nothing to do with where I am, although I 'm trying to look through the brochures for some pictures for inspiration.

Well,  here are some pictures I took the other day.  Can you guess where I am?


Happy WOYWW, everyone!

Tuesday, August 17, 2010

ATCs: For the Birds

Sharing with you some of my new artist trading cards (a close up of some of the cards in my previous post).  I like to bring blank cards and a pencil and  pen and make the line drawings for cards while I'm waiting or maybe watching TV and then when I have the time I will color them in with watercolors or colored pencils.  Hope you like them!

Wednesday, August 11, 2010

What's on Your Workdesk Wednesday: Wall Putty Cards


On my desk this Wednesday, you can see that I have been coating some card stock and old invitations with wall putty.  I am planning to have a 200th follower giveaway (optimistic! LOL) and I'm going to make something bigger than an ATC to give away so that is what the card stock is for.  Any suggestions about the theme?  Mother and child? Tree? Madonna?  The winner's portrait?  Oops, no, I can't do that!  Anyway, I will start on it when I get back from my two week trip out of the country.

And since I will be taking an airplane, I'm preparing what to bring in case I feel like making some artist trading cards (ATCs) while waiting in the airport or while on the plane.  It's a great way to while away the time (like when I traveled to Turkey).  Many of my artist trading cards are made using my extra wedding invitations (the printer printed too many so I am putting them to good use).  Julia, who organizes this Wednesday peek of 100+ desks once commented about my putting backing on my ATCs.  Well, I paste the backing to cover the invitation so that I have the space to write the info an ATC should have at the back.

Propped up at the back are my latest ATCs  (I will post close ups next time). In the picture below, you can see them drying on my sewing machine (taken last weekend) because I couldn't even use the push back method to make some space for them.


I finished the blouse I was altering (tutorial here) and guess what, my sister Patsy said she is going to try it out.  LOL, I write a tutorial and my sister, who lives right beside me, will try it out (I could have given her one on one lessons!)

And in case you haven't, why not back up your blog.  I'm not sure if I will be able to post next Wednesday as I will be away.  Who knows!  Til next time, happy WOYWW!

Sunday, August 8, 2010

Celebrate Your Creative Spirit


Cindy is having a link party today where we're supposed to post something that we think shows our Creative Spirit.  I chose one of my favorite artist trading cards.  It is done using my favorite technique (tutorial here), it shows one of my favorite Mother and Child themes and it says what I believe.  Indeed the Lord has done great things for me.  I like to think that my creative spirit is just a reflection of His.

Also linking up to Looking for a Creative High Party .

Saturday, August 7, 2010

Have you Backed up your Blog?

42-15239555
Way back in 1998, I had a web site in GeoCities (http://www.geocities.com/Heartland/Valley/8063/).  It was called

peggy's page 
(about God, family, kids, crafts, graphics, and making your own page)

This is what the first page said...(and I noticed that my blog is still about similar topics.)

"Let's talk about...
...God.
Life is often complicated and full of challenges but the Lord makes all the difference. He is the source of peace and joy in whatever circumstances we find ourselves in. Even when we walk through the dark valley we can trust that He will always be with us, to refresh and strengthen us. (I have posted about the dark valley I have passed through in this post and have shared my faith in many other posts like the one about hot air balloons, running the race and birdseed blessings.)

...Family.
These days we often have so much to do and so little time. We need to make the most of the time we have with our families, with creative activities and celebrations. Make happy memories for everyone! All of us parents know that parenting is a really important job!  (I've celebrated special days like Mother's Day, Father's Day, Earth Day, and Easter with you!)

...Kid stuff.
Playthings, Gardening, Story telling, Games, Cooking and Baking, Collecting, Crafts, Bird Watching, Kite Flying, Sewing, Scrapbooks, Paperdolls, and Puppets are just some of the fun activities for kids I'll be talking about. Let me tell you about some of my own experiences when I was growing up and of raising my daughter Elyse who is now 19 years old. Visit Elyse's page which she made herself when she was 9 years old.  
 (I've shared about being a mother in this post, and this one and those of you who have been visiting me for a while know all about my crafts, sewing and the "bird watching" I did with our baby bird Squirt).

...Crafts.
I'll be adding pages and links to some of the arts and crafts I'm interested in: Kids crafts, Play Clay and Decorative Dough, Stencilling, Paper Cutting (Scherenschnitte and Silhouettes), Crayon Resist, Easter Eggs, Potato Stamping, Rubber Stamping, Collages, Paper folding, Cross Stitch and other Embroidery, Quilting, Knitting, Crochet, Needlepoint, Applique, Pressed Flowers, Tie-dying, Marbleizing, Paper Mache and Handmade paper. So many things to do and so little time, and now here I am making a web page.  (And here I am making a blog and I've posted about scherenchnitte, collages, paper folding and what next!)

...My Graphics. Visit my graphics page and look at my drawings of teddy bears, little kids and a few other things. Come back later and see if I've added some more.  
(Here are some graphics I offered in my web site...
...and I have just found out about digi stamps and was wondering if anyone would be interested if I offered them here.)  

...My Web Page.
In June 18,1998, after visiting a friend's web page at Geocities, I visited the other neighborhoods as well. There was a vacant lot at Heartland Valley. What a nice name! Well, why not? I moved in and here I am! Since I started making this page I've been busy looking for stuff to add. I think the web graphics are soooo great. Did you notice that my favorites are the animated gifs? Also, visit my links page: Christian, family, kidstuff, crafts and graphics sites, make your own webpage and promote it.  (After learning how to make my web page, I was able to help make some websites for family and friends and to help them with search engine optimization.)

Also, visit my Heart to Heart Collection, with poems, quotes, and stories to encourage and inspire. (I've shared a favorite story of The Three Trees and the songs Every Season and Five Loaves and Two Fish.)

Well, you may ask what this all has to do with my question "Have you Backed up your Blog?"  On October 26, 2009, GeoCities closed and all the web pages there (including mine) just disappeared (Wikipedia says there were at least 38 million user-built pages on GeoCities before it was shut down.)  I was able to back up my pages because they did announce the closure, but unfortunately, not everyone knew how to back up their pages.

And so, after all the time and effort we put into our blogs, don't you think it's a good idea to back it up regularly?  If your blog is on Blogger, from your Dashboard, click on...

Settings
Export Blog (on the right of Blog Tools)
Download Blog
Save File

You will now have an XML file which you can use to upload your site somewhere else if necessary (at least that's the way I understand it, this could be a case of the blind leading the blind).  If your blog is not on Blogger, sorry, but I guess you'll have to check the Help page or ask Mr. Google.  Hopefully we never need to use our back up file but since it only takes a short time, I think it's worth the effort.  What do you think?

Friday, August 6, 2010

How to Alter Clothes 2: Sewing

In this post, I shared about how I made my pattern (by tracing an old blouse) which I use to alter clothes.  Now I will show you my way of altering clothes (from a big size to my size).

So, let's say I have a blouse I want to alter to fit me, like this one.  Hmmm, seems I did not pick a good one to work on since it is white and my bed quilt is also white.  Sorry about that.


So this blouse is BIG (large size Mossimo brand), but I liked the neckline details and it cost only, would you believe, the equivalent of 25 cents.

1.  I start out by turning it inside out and folding it down the center, pinning the sides to make sure it doesn't move.

2.  I lay it out and put the cardboard pattern on top of it, tracing out the pattern with tailors chalk or something else that will wash out.

3.  If you want to check out your pattern before you cut the cloth, you can pin the sides and try out the pinned blouse.  Careful you don't get pricked!

4.  If you are confident about your pattern, just cut out the extra cloth, leaving an allowance of approximately 1.5 cm (5/8 inch).  I used to leave a bigger allowance, when I was afraid of making my blouse too tight, but I always ended up with a loose blouse.  So, if you are confident about your pattern, you can just leave the 1.5 cm.


5.  Lay the sleeve pattern on the cutout sleeves (pinned together), mark and cut out both the sleeves as well.

6.  I start to prepare to sew the sleeve to bodice seam (this is not the expert way, I know, but I think it is the much easier way).  First, I position the cloth pieces so that I won't get confused about which side to sew.


7.  Then, I turn the sleeve piece to make right sides face each other.


8.  I start pinning the sleeve at the middle fold of the sleeve, making it meet the top seam of the blouse, and continue pinning down both sides.


9.  After pinning, you are ready to sew the pieces together.  Remember, and sew 1.5 cm away from the edge of the cloth (on the wrong side).  Actually this can be the most challenging part because it requires sewing curved seams but I do it very slowly.  Those lines on the sewing machine will help you sew the seams evenly.


10.  With the sleeves sewn on, do a zigzag stitch around to keep the cloth from unraveling.

11.  So sorry, but by this time, I forgot to take pictures (too excited to finish the blouse).  But with the blouse turned inside out, pin the sides, sew the side seams, and again do the zigzag stitch.

12.  Then I do the hem of the sleeve (usually, I cut long sleeves to short sleeves).  And viola!  The blouse is finished and I dumped it into the laundry bin and forgot to take a picture!

So there, if you ever buy a 25 cent blouse in the wrong size, you can try altering it.  If it doesn't turn out well, who cares, maybe the next try will be better.  If it turns out well but there are a few crooked seams, I assure you, twinkling eyes and a lovely smile will easily camouflage the crookedest of seams.  Next tutorial... how to have twinkling eyes and a lovely smile.  Just kidding, I'm sure you all know how to do that!

Wednesday, August 4, 2010

What's on Your Workdesk Wednesday and some Giveaways


Hello, WOYWWers and all my other blog friends!  Last Wednesday, I shared about altering my clothes and some of you may have thought I actually know how to do this expertly.  Well, I wrote a post about how I made the pattern that's on my desk today.  I alter clothes with just this pattern and no measurements (something like doing it the "Sewing for Dummies" way).  

Also on my desk today are some envelopes.  I've been preparing them to send off with the new trades I've made this week.  Look up this post if you want to take a peek at the artist trading cards I made this week.

For a visit to more workdesks, messy and otherwise, hop on over to Julia's blog!  Hopefully, I will have a more interesting desk next week!

Have you heard about the great Silhouette giveaways going on?  There are giveaways on Tidy MomSugar Doodle,  V and Co., The Idea Room, and Mom Advice for the Silhouette machine.  This machine can help you make all sorts of wonderful projects.  You'll see it on my desk if I win it!  Or who knows, I could see it on yours if you join!

Monday, August 2, 2010

How to Alter Clothes, Making the Pattern: Advice from an Expert?

The Coveted Wolf Dress Form

Ok, I confess, that's not the right title for this post.  It should be "Advice from someone who has no idea what advice an expert would give."  Well, you didn't really think I was an expert on altering clothes did you?

I was delighted with all the comments I got from my "What's on Your Workdesk Wednesday" visitors.  But, oh no, I may have misled you to believe that I actually know HOW to alter clothes!  Well, if you need advice from an expert, you won't find it here.  Maybe this site can help you!  It sort of puts down what I TRY to do.

If any of you are expert seamstresses, I suggest you stop reading my post.  You may faint while reading about my method or say, I can't believe she is actually sharing her absurd way of altering clothes, the nerve!  Actually, I can't believe it myself.  Hmmm, I never know what I will post about next!  Well, here goes, I did warn you...

This is the way I made a pattern...
1.  Some time ago, I had a blouse that I really liked.  I especially liked how it fit me.  Well it got so faded that it was ready to be thrown out/cut up into projects/made into rags.  But, since it fit me so well, I decided to try to make a pattern.

2.  I took it apart at the seams (using a seam ripper).

3.  I folded the bodice part lengthwise and laid it out flat on a piece of cardboard/chipboard.  Since the blouse is symmetrical, I only need a half pattern.  Experts will say that the front and back of a blouse are not the same and the armhole is different in the front and the back.  So true.  But of course, I must say that I prefer loose fitting blouses (very useful for camouflaging bulges) and so, my pattern does not need any tucks and does not need to be so exact.  My inexpert method just won't work for form fitting blouses.

4.  I traced the shape of the folded bodice part, minus the seam allowances. 

5.  I folded the sleeve piece lengthwise and laid it out on a piece of cardboard/chipboard.  Again experts will say that the sleeve is not exactly symmetrical, with the back curve different from the front.  So true.  But as I said, if you aren't making a form fitting blouse, it hardly matters.  Besides, if the blouse you want to alter is so big that you couldn't wear it unless you fixed it, you might as well fix it the inexpert way if that's the only way you can, at least that's what I think.

6.  I traced the shape of the sleeve, minus the seam allowances.

5.  I cut out both traced shapes (bodice and sleeve) and viola!  These two pieces of cardboard are the patterns I use to alter my blouses.  Easy peasy!


Next time I will start the sewing...


Sunday, August 1, 2010

New Artist Trading Cards

Hello, everyone!  I hope you are having a good weekend.  I finished some cards and thought I'd share them with you...


The first one is titled "Earring Girl 2".  She didn't scan so well because her earring is somewhat thick.  I used pen, watercolor and colored pencils on a textured card.


The next card is "Rooster."  I made it for someone who collects rooster ATCs.  I am so happy that she likes it.  She even said she would frame it and put it in her kitchen!  Awww!


Here is a card called "Black Haired Senorita."  I made it by cutting out a ballpen sketch I made.  I pasted it unto a piece of junk mail card cut to the right ATC size (2 1/2 by 3 1/2 inches).  Then, I gave it a light coating of gesso, and colored it with watercolor and colored pencils.  I made a tutorial about this technique in case you're interested.


This next card is called "Ineng."  Ineng is a name you call a young girl in Filipino when you don't know her name.  I used the same technique as the previous card.


The last card is another bird card, "Jay."  This is another card I drew using my son's book as a guide.  Again, here, I used the low cost wall putty that you buy in the hardware store.  See the texture that comes out when you rub the colored pencils on to the card?

Hope you like the new cards!
Related Posts with Thumbnails